Agent Upload to S3 Bucket
The following steps outline the process to enable Ganymede Agents to write directly to an S3 bucket of your choosing. To successfully complete these steps, you will need:
- A Ganymede user account with Administrator permissions.
- An AWS account with permissions to create S3 buckets, create roles, and create policies.
Step 1: Set Up Your S3 Bucket in AWS
First, create the S3 bucket where files will be uploaded via the AWS Console. If your bucket already exists, you can skip this section.
- Navigate to Amazon S3 in the AWS Console.

- Click the Create Bucket button.
- In the Bucket Name field, provide a name for your bucket.
We suggest prepending "ganymede_" in the name to make buckets easier to manage.
- Click the Create Bucket button.
- Keep the link to this bucket handy, as we will modify the bucket policies later.
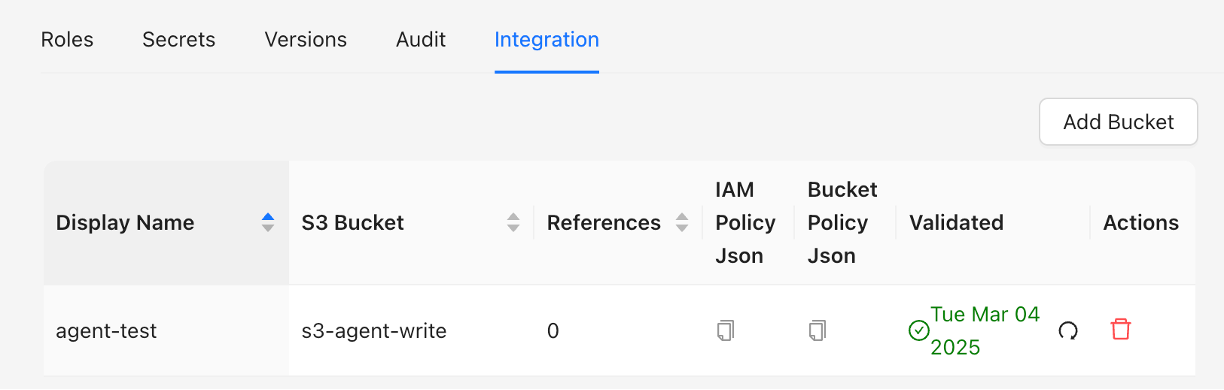
Step 2: Add the S3 Bucket to Ganymede
Next, we need to add the S3 bucket to your Ganymede environment:
-
Navigate to your tenant in the Ganymede web app (https://[tenant].ganymede.bio)
-
Select the environment you want to add the S3 bucket to.
-
Click on your login ID to access Environment Settings in the top right corner and navigate to the Integration Panel

-
Click the Add Bucket button.
-
Input the following details:
- S3 Bucket Name: Enter the name of the S3 bucket you created.
- Region: Enter the region where your bucket is located (e.g.,
us-east-1). - Display Name: Enter a display name for your S3 bucket (optional).
Note: The bucket name must be entered exactly as it appears in your AWS console.
Step 3: Set Up an AWS Role ARN
Next, we need to set up an AWS role with the appropriate permissions to access the bucket. If you already have a role ARN set up within Ganymede, you can modify it to ensure it has the correct permissions for your bucket.
- In a new browser window, navigate to the IAM Console in AWS: https://console.aws.amazon.com/iam/

- In the left-hand menu, click on Roles.
- Click the Create Role button.
- Select Trusted Entity:
- Choose AWS service as the trusted entity type.
- Select S3 from the list of services.
- Click Next.
- Attach Permissions Policies:
- Attach the AmazonS3FullAccess policy to the role.

- Attach the AmazonS3FullAccess policy to the role.
- Click Next.
- Provide a name for your role (e.g.,
MyS3Role). - Leave the trust policy as is for now and click Create Role.
Once the role is created:
- Search for the role you just created.
- Select the role to open the role details page.
- Copy the Role ARN located in the upper right corner.
Keep both AWS and Ganymede browser windows open for the subsequent steps.
Step 4: Add the Role ARN to Ganymede
- Return to the browser window with your Ganymede web app: https://tenant.ganymede.bio
- Select the environment to which you want to add the S3 bucket.
- Access Environment Settings in the top right corner and navigate to the Integration Panel.
- Find the AWS Ganymede Role ARN field and paste the Role ARN you just copied.

- Refresh the Ganymede page to ensure the Role ARN is propagated.
Step 5: Update Role Permissions
Now that your role is created in AWS, we can update its permissions.
- In your AWS Console tab/window, navigate back to the role you just created.
- In your Ganymede tab/window, navigate back to the Integrations tab in Environment Settings.
- In the AWS Console, click on the Trust Relationships tab.
- Click Edit Trust Policy.
- In your Ganymede window, locate the Trust Policy under AWS Trust Policy JSON.
- Copy the value from the “Statement” key in the AWS Trust Policy JSON.
- Append these copied elements into the existing “Statement” array in the AWS console.
- Click Update Policy.
Step 6: Create an IAM Policy
- In your AWS Console tab/window, navigate to IAM Policies and click Create Policy.
- In your Ganymede tab/window, copy the IAM Policy JSON by clicking the copy icon next to your bucket.
Refresh your page before copying to ensure the policy is updated with any changes you may have made.
- Save the policy with a name in the format
ganymede-BUCKET-NAME-access. - Navigate back to the AWS role you created and click Add Permissions.
- Select Attach Policies, then search for and select the policy you just created.
- Click Add Permissions.
Step 7: Update Bucket Policies
The last step is to update your bucket policies to control access.
- In your AWS Console tab/window, navigate to the created bucket.
- Select the Permissions tab.
- In the Bucket Policy section, select Edit to open the JSON editor.
- In your Ganymede tab/window, navigate to the Integrations tab and copy the Bucket Policy JSON by clicking the copy icon next to your bucket.

- Paste the copied JSON into the JSON editor in the AWS Console.
- Click Save Changes.
Next, configure CORS (Cross-Origin Resource Sharing):
- In the Permissions tab of your S3 bucket, scroll down to the Cross-origin resource sharing (CORS) section.
- Click Edit.
- In your Ganymede tab/window, copy the AWS Bucket CORS JSON by clicking on the document symbol on the right side of the relevant cell in the Integration Panel.
- Paste the copied JSON into the AWS CORS editor.
- Click Save Changes.
Step 8: Test the Connection
With the setup complete, the final step is to test your connection.
- Return to the Integrations panel within the Ganymede web app.
- Next to your bucket, click the Validate Setup button.
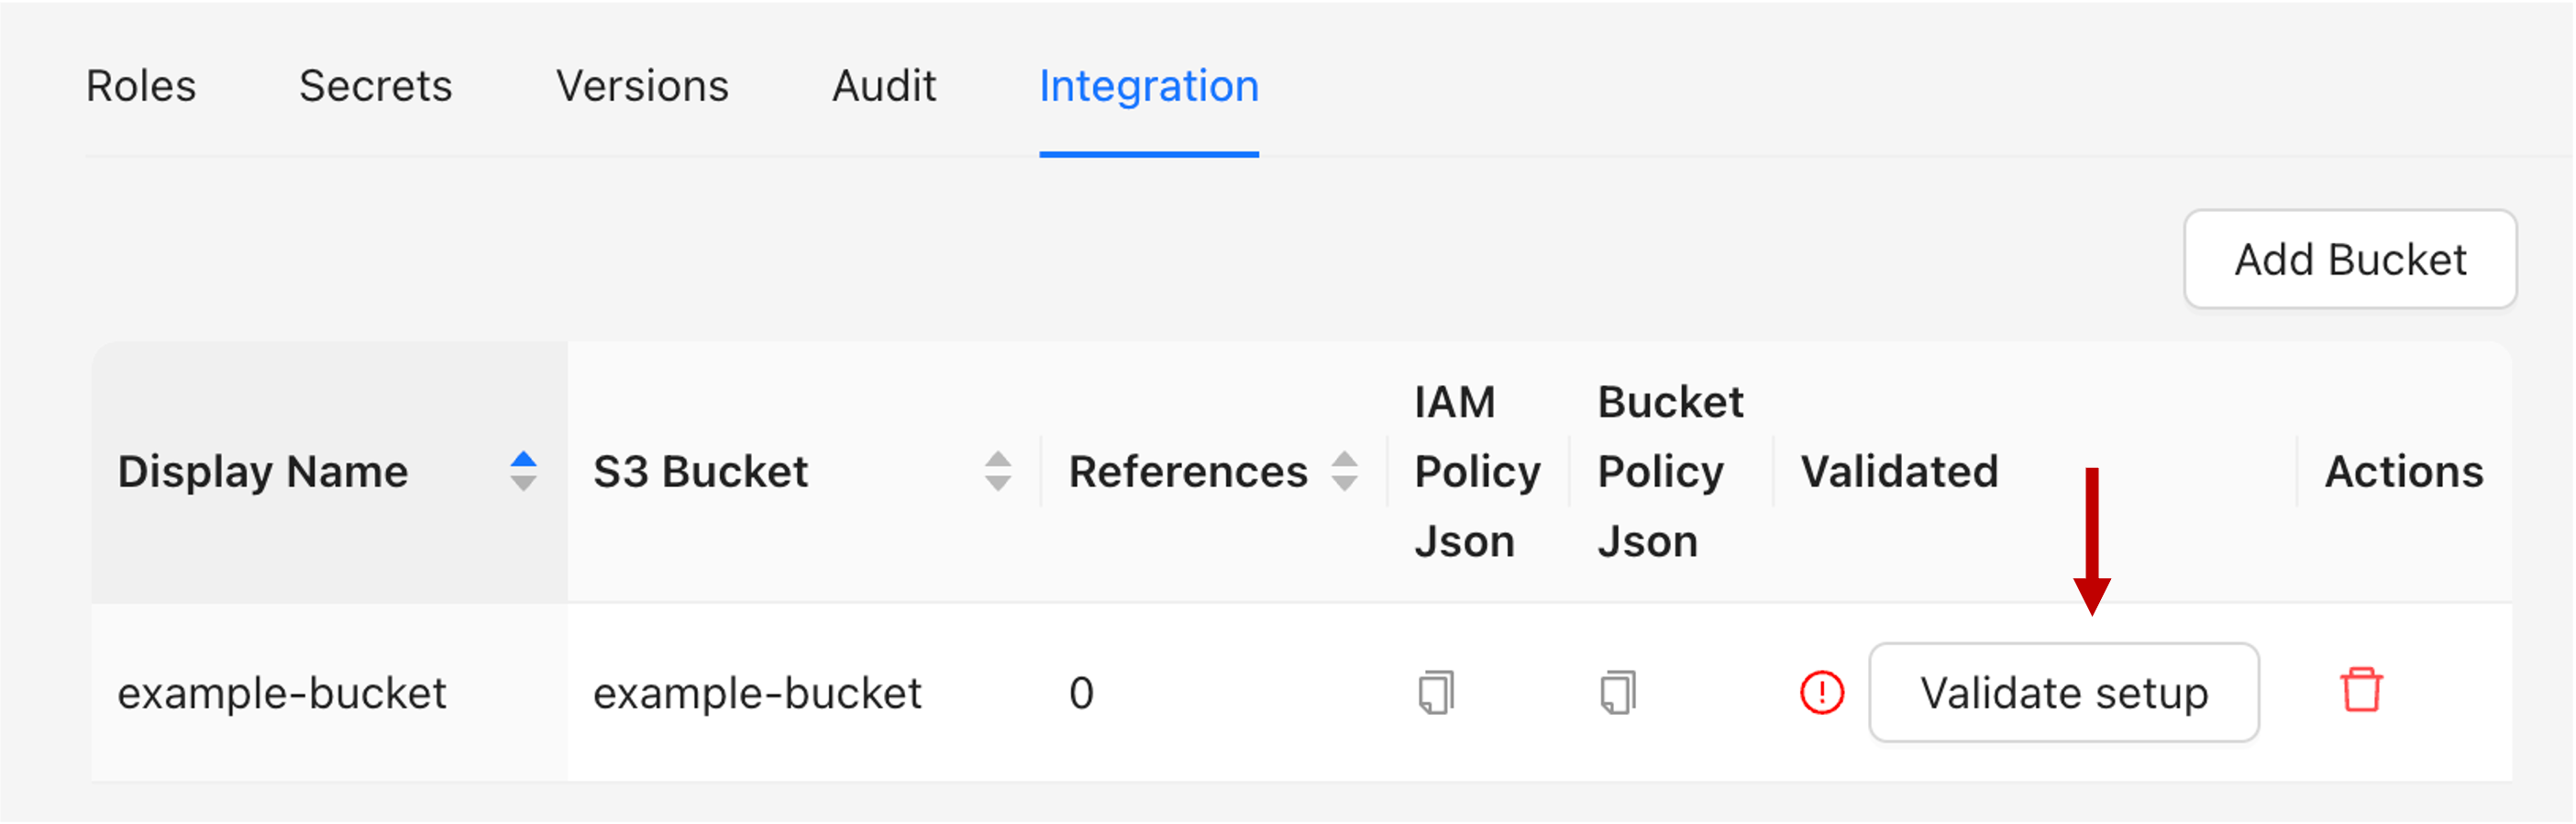
- A successful test will result in a success message.
- If testing does not succeed, please reach out to Ganymede support for assistance.